The approach to resanding an old engineered wood floor requires extreme caution and a thorough understanding of its construction, particularly the thickness of the top hardwood veneer layer. Here’s a step-by-step approach:
Determine if Sanding is Even Possible
- Veneer Thickness is Key: This is the most crucial step. Engineered wood has a thin layer of real hardwood (the veneer) bonded to a core of plywood or other composite material. Sanding removes part of this veneer, so you need to ensure it’s thick enough to withstand the process without sanding through to the core.
- General Guidelines:
- Less than 2mm veneer: Generally not recommended for sanding. You risk exposing the core.
- 2mm – 3mm veneer: May allow for one very light sanding or buffing to refresh the finish, but be extremely cautious.
- 3mm or thicker veneer: Might allow for 1-2 sandings, similar to solid hardwood, but still with care.
- How to Check Veneer Thickness:
- Look at edges: Examine the edges of the planks, especially in doorways, vents, or areas where the floor meets walls. You might be able to see the different layers.
- Check under vents or remove trim: Carefully lift a floor vent or remove a small section of baseboard to get a clearer view of the plank’s side profile.
- Consult original product information: If you have access to the manufacturer’s specifications, it should state the veneer thickness.
- The “Coin Test” (use with caution): Drop a coin in an inconspicuous area. A hollow sound might indicate a thinner veneer, but this isn’t a definitive test.
Thorough Preparation
- Clear the Room: Remove all furniture, rugs, and obstacles.
- Clean the Floor: Sweep and vacuum thoroughly to remove all dirt, dust, and debris.
- Inspect for Damage: Identify any loose boards, protruding nails, or uneven areas that need addressing before sanding.
- Fill Gaps (Optional): For small gaps, you can use a wood filler that matches the floor color. Allow it to dry completely before sanding.
Gentle Sanding – Prioritizing Minimal Material Removal
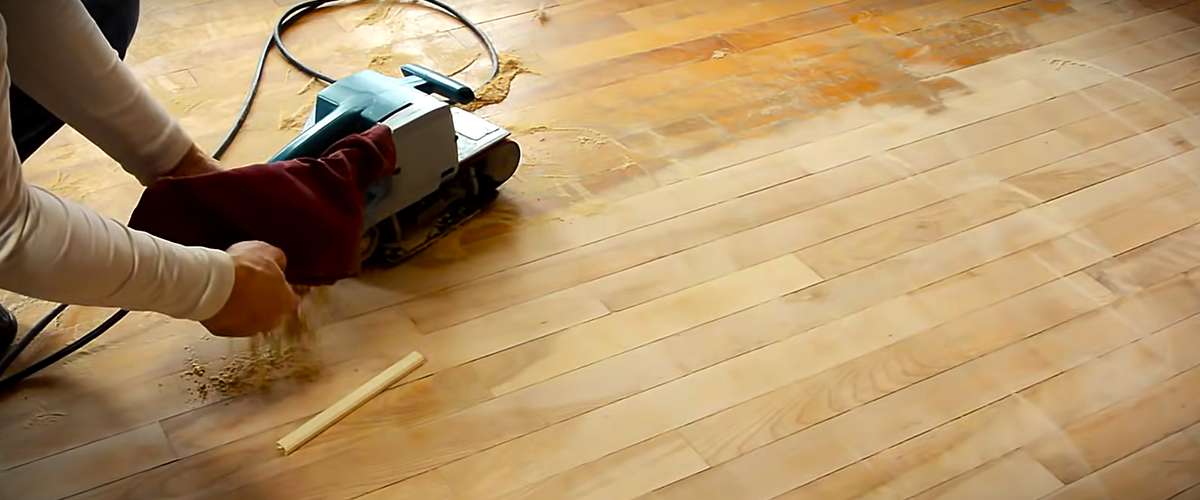
- Use the Right Sander: Orbital sanders are generally recommended for engineered wood due to their less aggressive action compared to drum sanders. If you’re a DIYer, a random orbital sander is a safer choice. Professionals might use specialized engineered wood floor sanders.
- Start with Fine Grit: Begin with a finer grit sandpaper (100-120) than you would for solid hardwood. The goal is to remove the existing finish and light scratches with minimal wood removal.
- Light and Even Pressure: Apply consistent, light pressure. Avoid dwelling in one spot, as this can quickly sand through the veneer.
- Sand with the Grain: Always sand in the direction of the wood grain.
- Multiple Passes: Instead of trying to remove everything in one aggressive pass, make several light passes over the entire floor.
- Progress to Finer Grits (If Necessary): If the initial sanding with a finer grit doesn’t remove the scratches, you can carefully move to a slightly coarser grit (e.g., 80-100), but proceed with extreme caution. Always finish with finer grits (120-180, possibly 220) to smooth the surface for finishing.
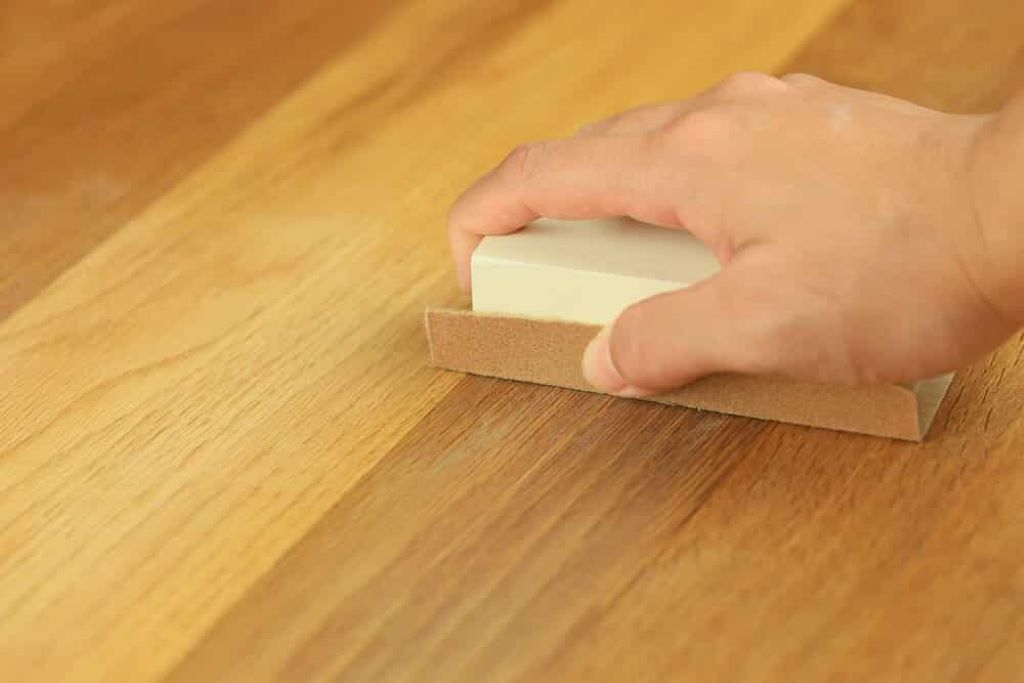
- Manual Sanding for Edges and Tight Spots: Use a hand sanding block with the same grit sandpaper for edges and areas the sander can’t reach.
Thorough Dust Removal
- Vacuum Meticulously: Vacuum the entire floor surface, including edges and corners, to remove all sanding dust.
- Tack Cloth: Wipe the floor with a tack cloth to pick up any remaining fine dust particles. This is crucial for a smooth finish.
Refinishing
- Choose a Quality Finish: Select a durable wood floor finish suitable for your needs (e.g., polyurethane – water-based or oil-based).
- Apply Thin, Even Coats: Follow the manufacturer’s instructions for applying the finish in thin, even coats.
- Light Abrasion Between Coats (Optional): After the first coat is dry, you can lightly buff the surface with very fine-grit sandpaper (220-320) or a buffing screen to improve adhesion and smoothness for subsequent coats.
- Allow Proper Drying Time: Ensure the finish cures completely before moving furniture back into the room.
Important Considerations and Warnings
- Err on the Side of Caution: If you are unsure about the veneer thickness or your ability to sand carefully, it’s best to consult a professional flooring contractor experienced with engineered wood.
- Spot Test: Always test your sanding and finishing process in an inconspicuous area first to ensure you achieve the desired results and don’t damage the floor.
- Deep Gouges: Deep gouges might not be completely repairable by sanding without risking the veneer. Consider spot repairs or accepting some imperfections.
- Hand-Scraped or Distressed Floors: Sanding these types of engineered wood will remove their unique texture and is generally not recommended.
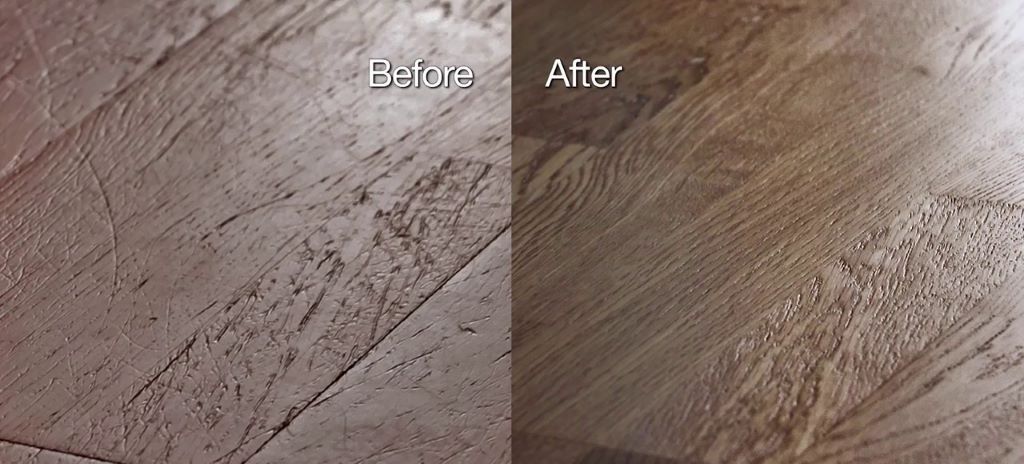
Resanding engineered wood is a delicate process with less room for error than sanding solid hardwood. Prioritizing minimal material removal and proceeding with caution are paramount. If the veneer is thin, cleaning and applying a refresher coat might be a safer alternative to sanding.